


Hello Integration Enthusiasts!
Welcome to the fourth part of Enterprise Integration with Dell Boomi. In the third part (read here if you haven’t), we had fetched Supplier details for every product that is to be reordered. In this blog post, we are going to discuss the fourth and fifth steps:
- Obtain the list of products
- For each product in the list, identify if reordering is required
- If product must be reordered, obtain supplier info
- Create a list of the products to be reordered along with supplier info
- Convert List into csv format
- Send List to Manager via Email
- Configure the Process to run every day
Step 4+5: Create a list of the products to be reordered along with supplier info in CSV format
At this point we have both product information as well as supplier details with us. It is now time to combine them so that every product also has details of it’s respective supplier. We are going to achieve this using a Message shape.
Message shape generates a free-flow text message from a dynamic or static set of input parameters. Documents that are sent to a Message shape are transformed, and the documents that come out have the format of the message.
Find the Message shape by searching for it in the search shapes bar and place it next to the previous shape. We are now going to configure this shape. After combining products and supplier info, this is the result that we want:
<Product>
	<ProductID>30</ProductID>
	<ProductName>Nord-Ost Matjeshering</ProductName>
	<CategoryID>8</CategoryID>
	<QuantityPerUnit>10 - 200 g glasses</QuantityPerUnit>
	<UnitPrice>25.8900</UnitPrice>
	<UnitsInStock>10</UnitsInStock>
	<ReorderLevel>15</ReorderLevel>
	<SupplierID>13</SupplierID>
	<CompanyName>Nord-Ost-Fisch Handelsgesellschaft mbH</CompanyName>
	<ContactName>Sven Petersen</ContactName>
	<ContactTitle>Coordinator Foreign Markets</ContactTitle>
	<Address>Frahmredder 112a</Address>
	<PostalCode>27478</PostalCode>
	<Country>Germany</Country>
	<Phone>(04721) 8713</Phone>
</Product>
We already have supplier Information as the content of our document and we can easily fetch every field data using the XML profile for supplier information query. Also, in one of our previous blog posts, we had stored product details into Dynamic document properties and we can fetch it from there now.
In the Variables field of Message shape, we are going to add these field data from Profile Elements and Dynamic Document Properties. Click on the + icon adjacent to this field. To add Profile elements, select the Parameter Type as Profile Element and configure it as shown below.
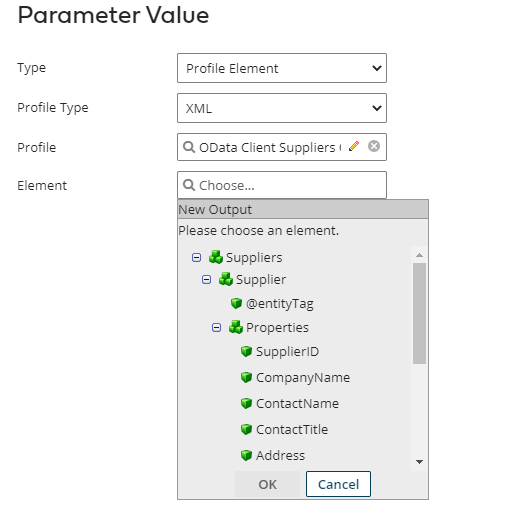
Since we have already done this once to create parameter for OData client connector, we’re not going to discuss the steps in detail again.
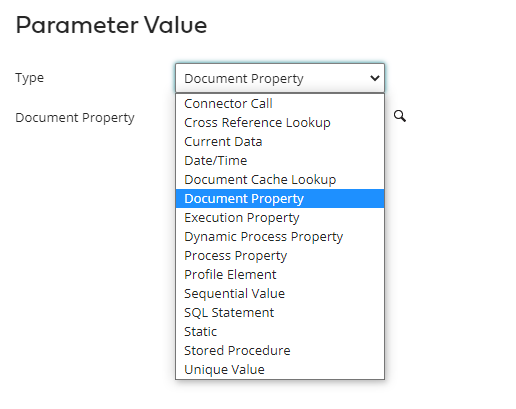
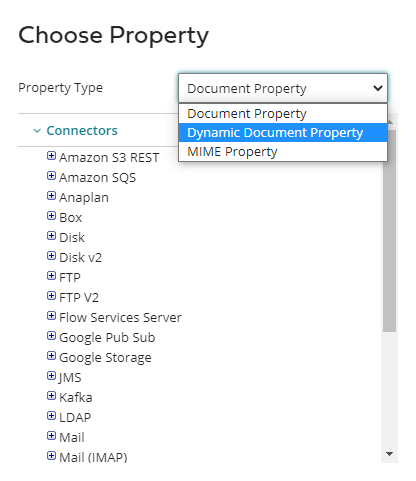
For using data from Dynamic Document properties, we are going to select Type as ‘Document Property’. You will notice that there is no option to specify type as ‘Dynamic Document Property’. This option is not visible by default in Boomi.
After this, click on the Search Icon next to ‘Document property’ field. This will open the following dialogue box:
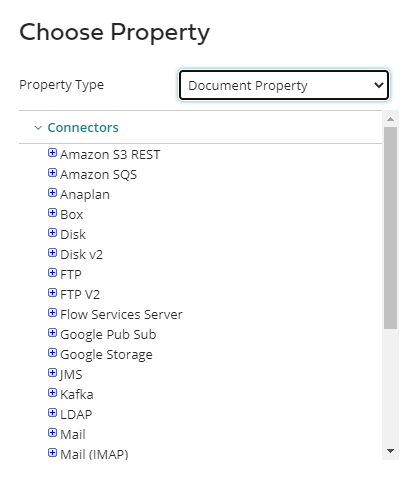
Now click on the Property Type dropdown and you will see the option for ‘Dynamic Document Property’.
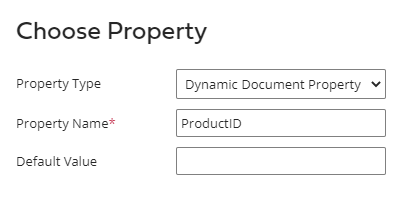
Enter the name of the property that you want to fetch and Default value for this property to be used in case data was not available (not mandatory). Repeat this step for every data field that was stored in Dynamic Document properties.
After adding variables, you will notice that each of them has a number assigned to it. This number can be used in the Message field to reference this variable.
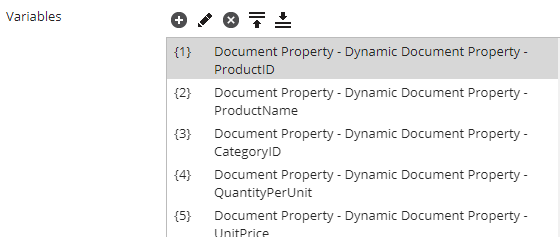
Thus, we can set the Message as :
<Product>
	<ProductID>{1}</ProductID>
	<ProductName>{2}</ProductName>
	<CategoryID>{3}</CategoryID>
	<QuantityPerUnit>{4}</QuantityPerUnit>
	<UnitPrice>{5}</UnitPrice>
	<UnitsInStock>{6}</UnitsInStock>
	<ReorderLevel>{7}</ReorderLevel>
	<SupplierID>{8}</SupplierID>
	<CompanyName>{9}</CompanyName>
	<ContactName>{10}</ContactName>
	<ContactTitle>{11}</ContactTitle>
	<Address>{12}</Address>
	<PostalCode>{13}</PostalCode>
	<Country>{14}</Country>
	<Phone>{15}</Phone>
</Product>
As discussed, numbers in curly braces are used to reference content of these variables.
In many ways, Message shape is like ‘Content Modifier’ shape of SAP CPI. In a content modifier we could have set the message body in a similar manner. But instead of using numbers denoting variables, we would have use the type(header/property) and name of the variables. Thus, the message body would have looked something like this:
<Product>
	<ProductID>${property.ProductID}</ProductID>
	<ProductName>${property.ProductName}</ProductName>
	<CategoryID>${property.CategoryID}</CategoryID>
	<QuantityPerUnit>${property.QuantityPerUnit}</QuantityPerUnit>
	<UnitPrice>${property.UnitPrice}</UnitPrice>
	<UnitsInStock>${property.UnitsInStock}</UnitsInStock>
	<ReorderLevel>${property.ReorderLevel}</ReorderLevel>
	<SupplierID>${property.SupplierID}</SupplierID>
	<CompanyName>${property.CompanyName}</CompanyName>
	<ContactName>${property.ContactName}</ContactName>
	<ContactTitle>${property.ContactTitle}</ContactTitle>
	<Address>${property.Address}</Address>
	<PostalCode>${property.PostalCode}</PostalCode>
	<Country>${property.Country}</Country>
	<Phone>${property.Phone}</Phone>
</Product>
Now that we have all the data we want, we are going to convert it into CSV (Comma Separated Values) format. This is slightly different from what we had done in SAP CPI where we had first Gathered all the Xml Nodes and then converted them to CSV at once. Please note that we could have done the same thing in Boomi as well, but I think this is a good opportunity for exploring a different approach to the same problem.
For conversion to CSV, we are going to use a Map shape. Maps are used to transform data from one format to another, or more specifically, from one profile to another. The Map shape references a predefined Map component.
Before we use a map shape, we are going to create a profile for the resulting CSV format. To do so, click on the +New button towards the upper left corner of the canvas. This will open a dialogue for creating a new Component.
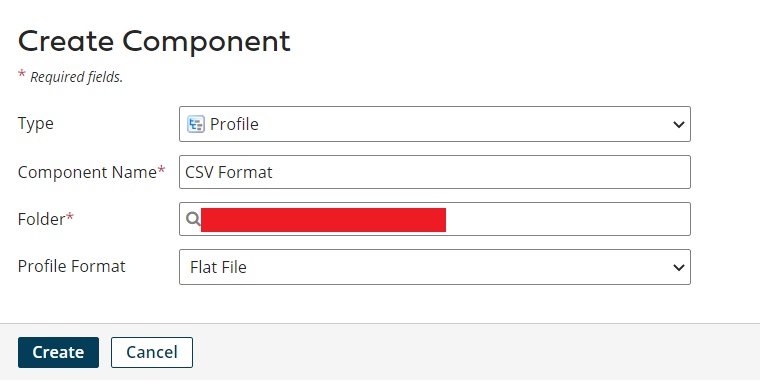
A new profile will be created.
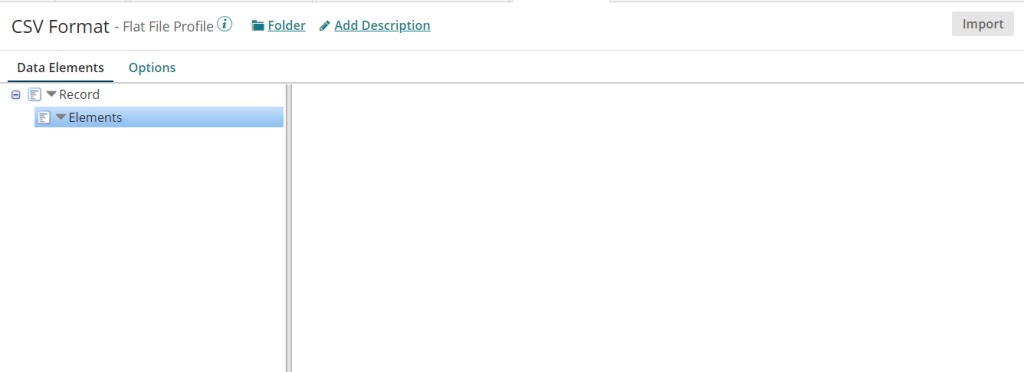
Click On the drop down arrow beside Elements and then on ‘Add Element’.
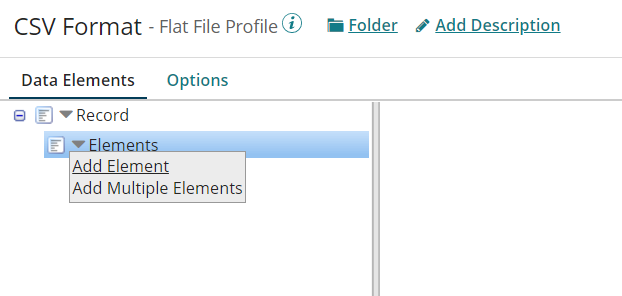
For every data field related to Product and Supplier that we have in our message, we will create a corresponding element in this profile.
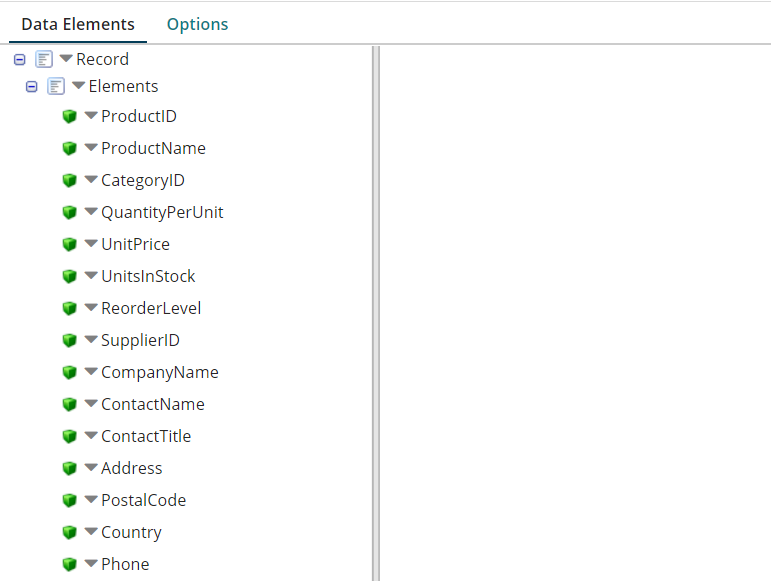
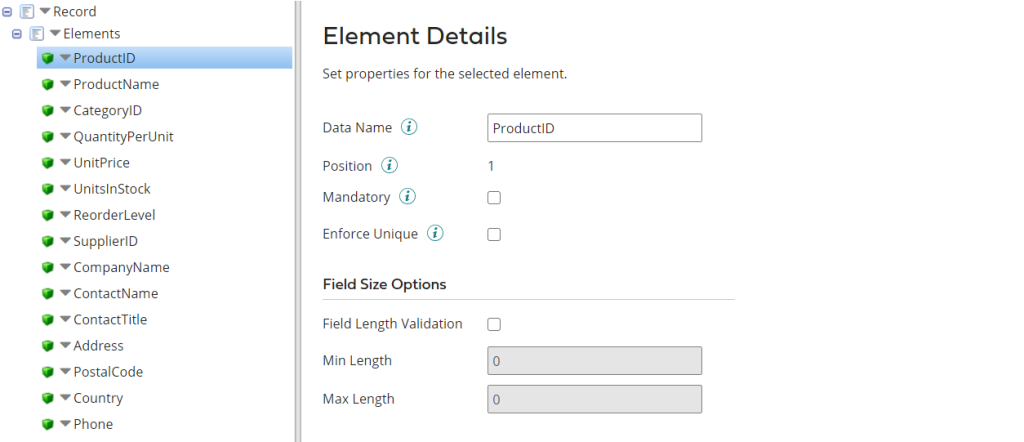
Apart from the name of the element, we do not make any changes. Save and close the profile once all the elements have been added.
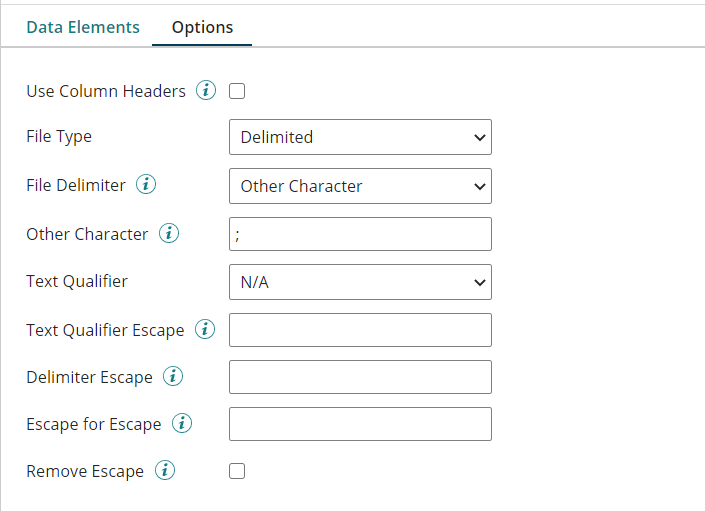
Click on the Options tab to specify the delimiter for this profile. We are going to use a semicolon as a delimiter. This can be specified as:
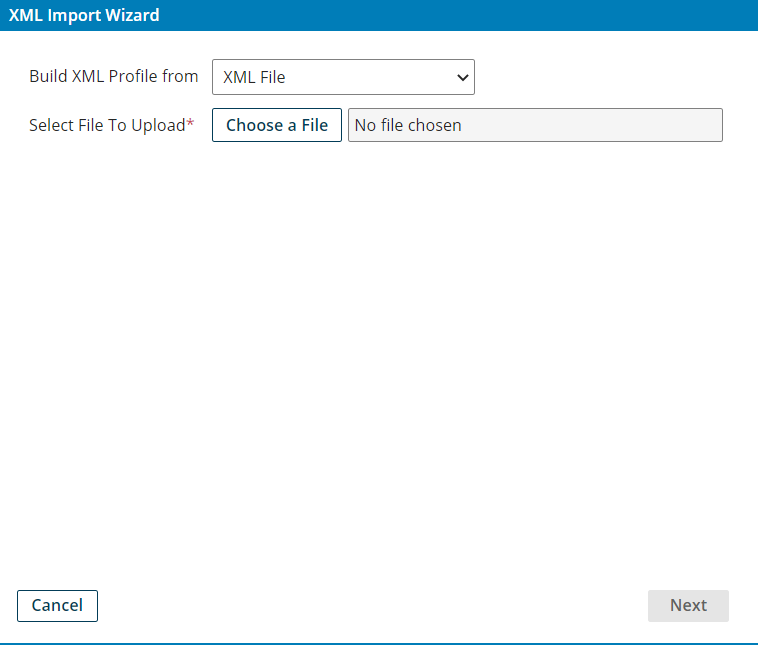
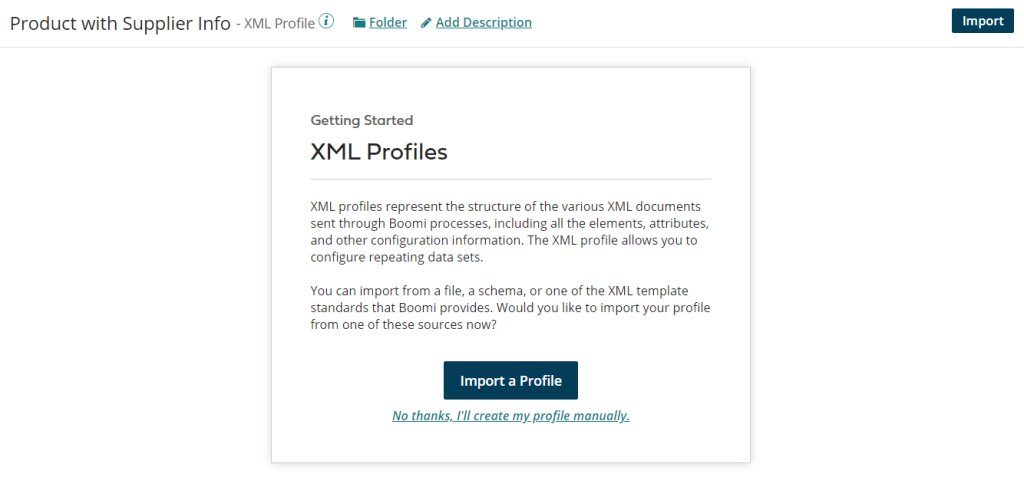
Similarly, we are going to create a profile for the combined data in XML format. Repeat the steps to create a profile, but create an XML profile this time. This is the screen you will be greeted by when you create a new XML profile.

Click on Import and you will be taken to an XML Import Wizard.
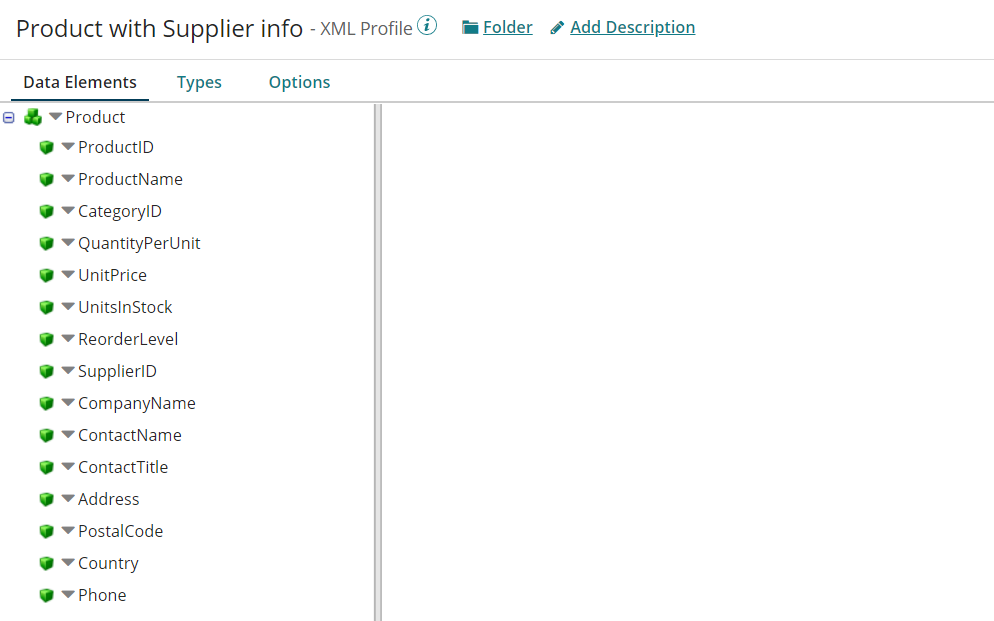
You can create this profile by simply importing the data coming out of the previous shape. This data can be obtained by running the process in Test Mode. After importing, this is what the profile will look like:
Now that we have both the source and destination profiles, we are going to add a Map shape on the canvas. Search for Map shape and add it after the Message shape that we had configured before this.
Click on the green + button next to ‘Map’ field. A new Map component will be created.
For Map Source, choose the XML Profile we created and for Map Destination, choose the flat file profile. We will now have to map every field in source profile to it’s counterpart in the destination profile. For this simply drag a connector/line from Source field to Destination Field. After mapping all fields, this is what the map component will look like:
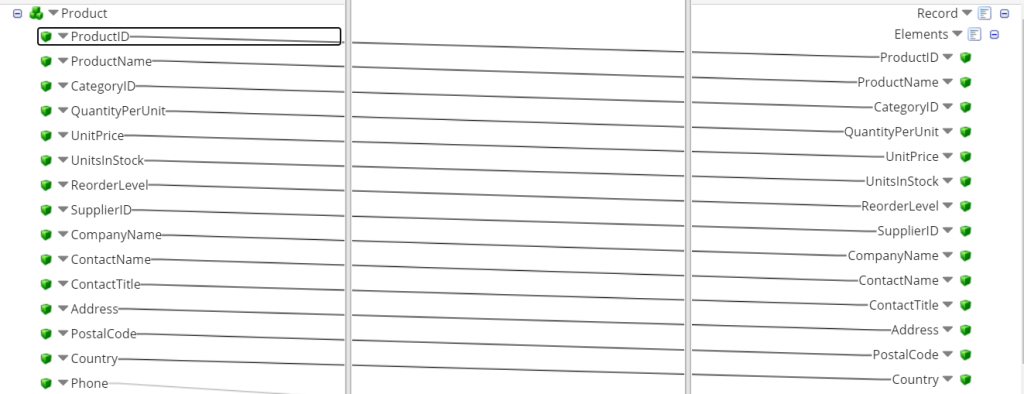
In more complex scenarios, we could have added functions to these mappings. Since our requirement is fairly simple, we do not need that. You can read more about these functions here.
Save and Close the Map component and run the process in test mode after connecting the map shape to the rest of the process. You will notice that the output from Map shape is in CSV format. But every document still contains details of a single product and we do not have a combined list as of now. This list can be easily created by combining all these documents together. We are going to use a ‘Data Process shape’ for this purpose.
Data Process shape provides you with a number of options for manipulating document data within a process, from splitting and combining documents to zipping and unzipping data. You can define multiple processing steps to perform more than one action on the document data. The processing steps are executed in the order defined in the Data Process shape. Each processing step operates on the data output from the previous processing step.
In SAP CPI, we had used a ‘Gather’ Shape instead. The functions of Gather shape are a subset of the functions of ‘Data Process’ shape in Boomi.
Search and place a ‘Data Process’ shape on the canvas and attach it to the ‘Map’ shape. Within the Data Process shape, add a Processing Step ‘Combine Documents’ and configure it like this:
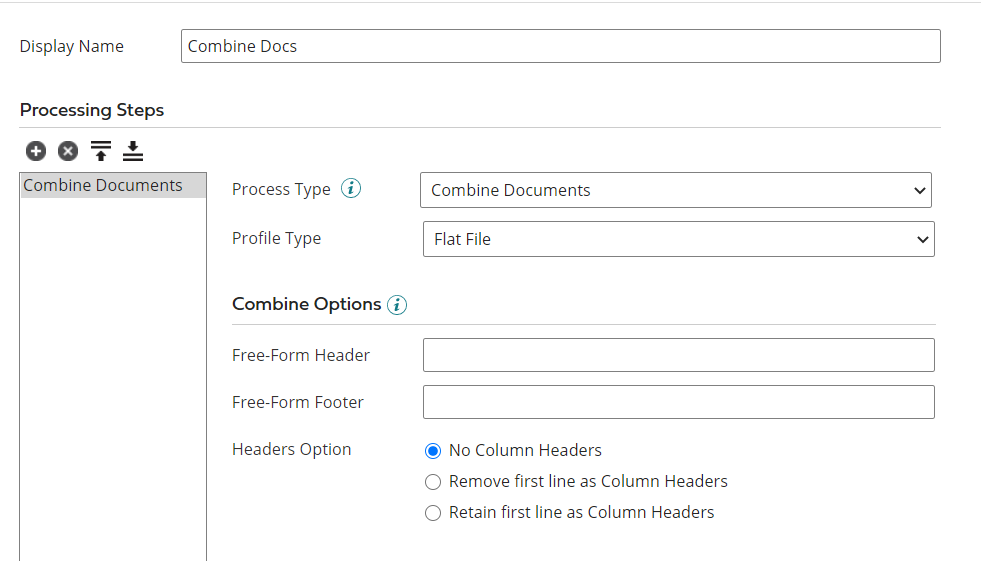
We have specified the Profile Type as Flat file as we have already converted data into CSV format.
If you run the process in Test Mode now, you will obtain a list of Products and Supplier Information in CSV format, which was the objective of this lesson. We’re going to pause this blog here so that you can fully understand and appreciate the topics we came across. In this blog post, we learned about Message shape, Map Shape, Data Process shape along with creation of Flat File and XML Profiles. We also discussed the counterparts of these shapes in SAP CPI. In the next blog post, we will get the data ready to be sent out and learn to use a Mail connector as we conclude our journey of Enterprise Integration using Dell Boomi. Till then, goodbye and happy learning!